We can access this function either through the Pocket queries tab available in the Play drop-down menu on the home page
 where, after clicking, a special subpage for creating Pocket Query will appear. There we select "Find Caches Along a Route"

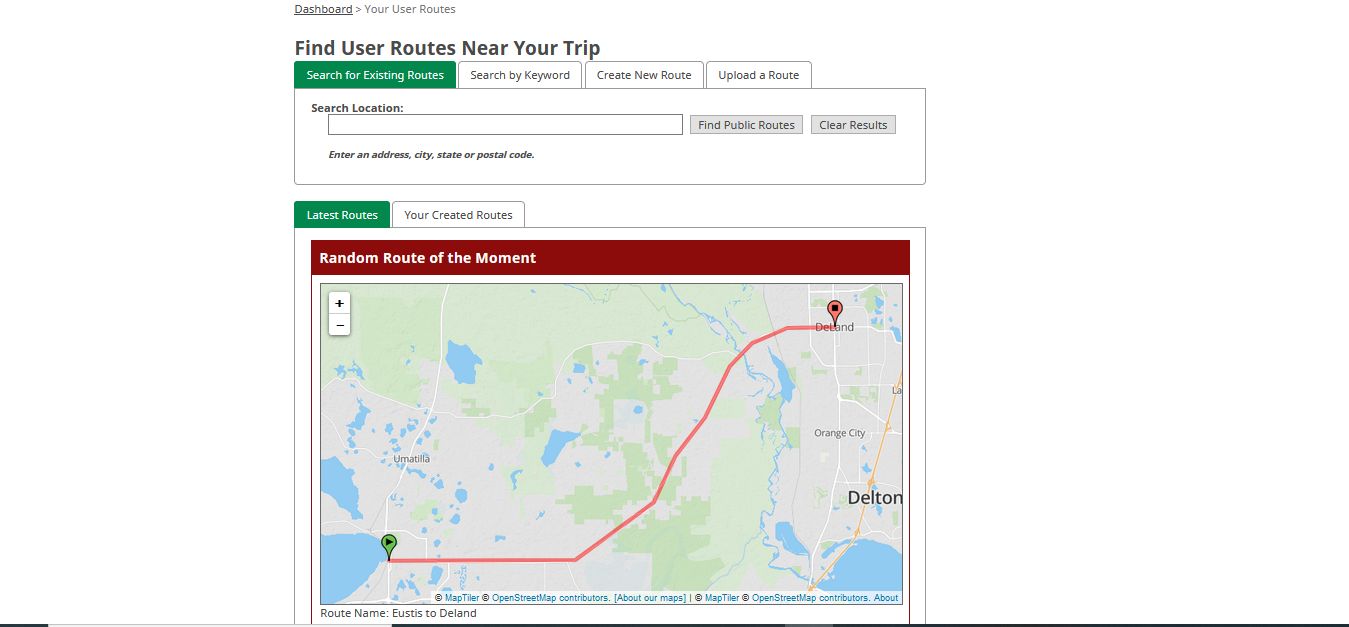
We can also access it from the user's desktop - in the column on the left in the Premium Tools section we will find it under the name "User routes" or using direct link: https://geocaching.com/my/userroutes.aspx

The process of finding caches along the road consists of two separate stages.
Stage one – We prepare our route
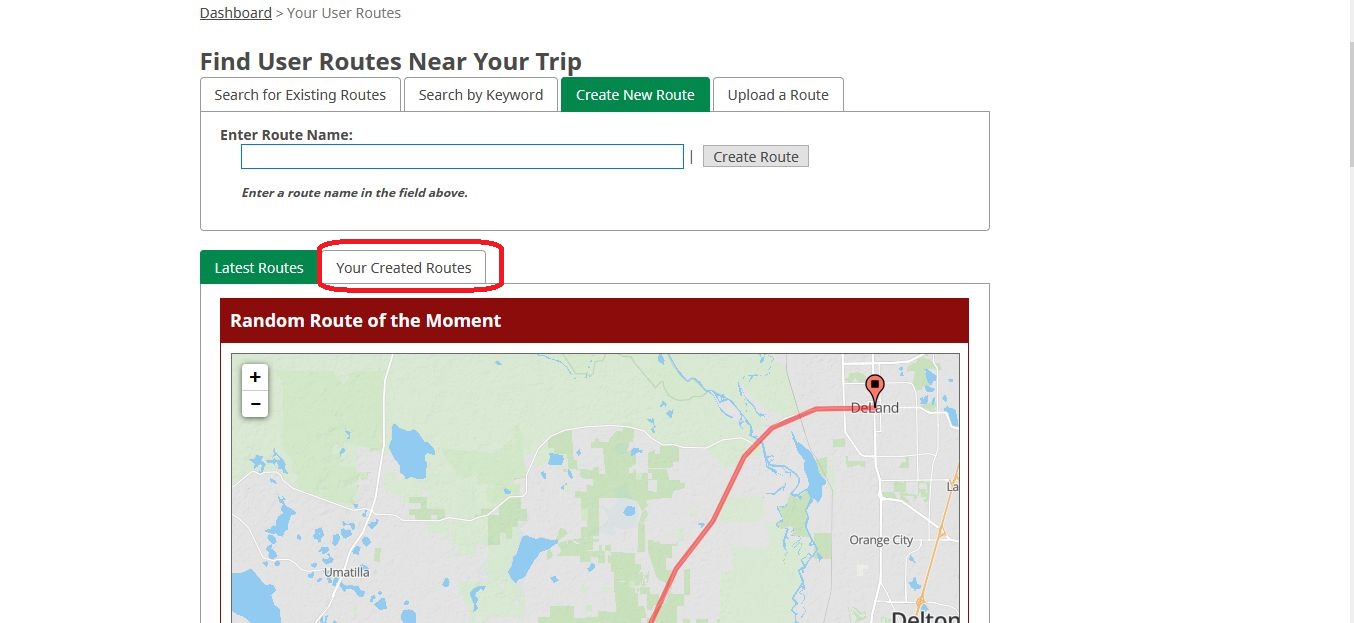
After clicking on User Routes, we will be transferred to a special subpage. There we can search for publicly available routes created by other players, create our own route, or upload a route previously saved as a GPX, KMZ or KML file.
Most often, we will simply want to create our own route. To do this, click on the "Create New Route" tab, then give your route a name
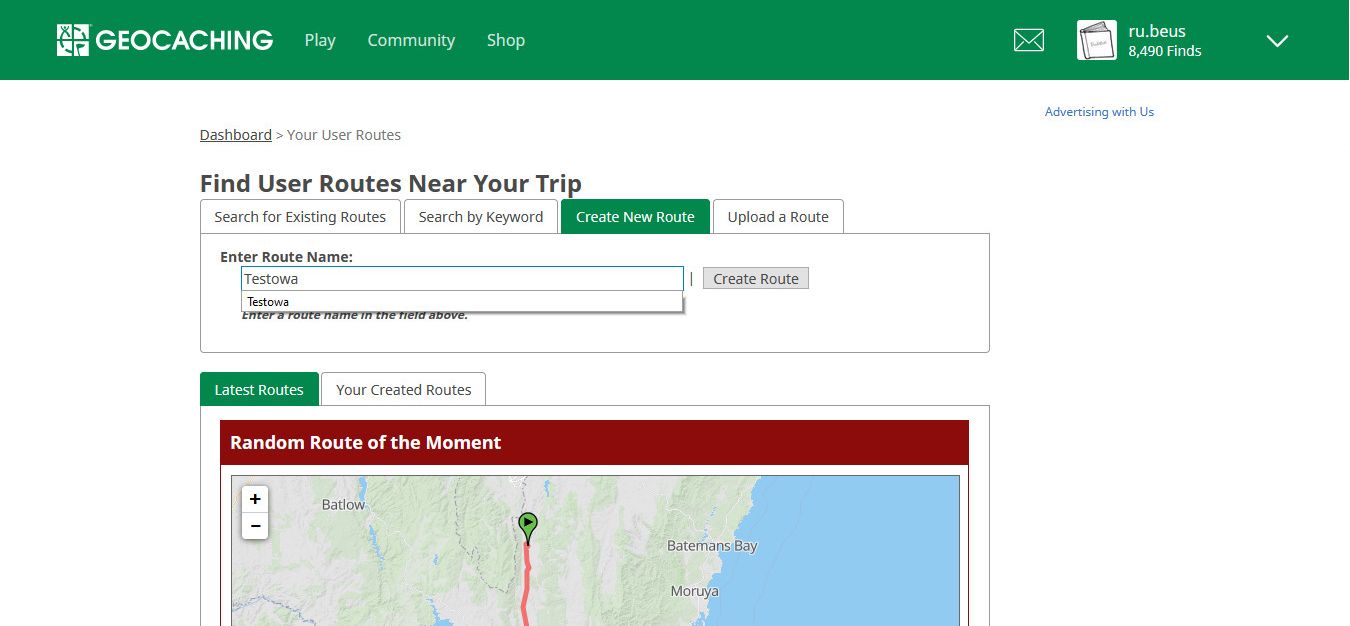
and click the Create Route button

A new page will open. Enter the address of the starting point and destination in the appropriate fields. We can enter either the exact address of both locations, or simply enter the name of the city.

After clicking the "Search" button, the script will calculate the route based on the data provided by Google Maps.

We can then freely modify the designated route by simply clicking on a fragment of the line and moving the nodal point to another place somewhere on another road - our route will automatically adapt.
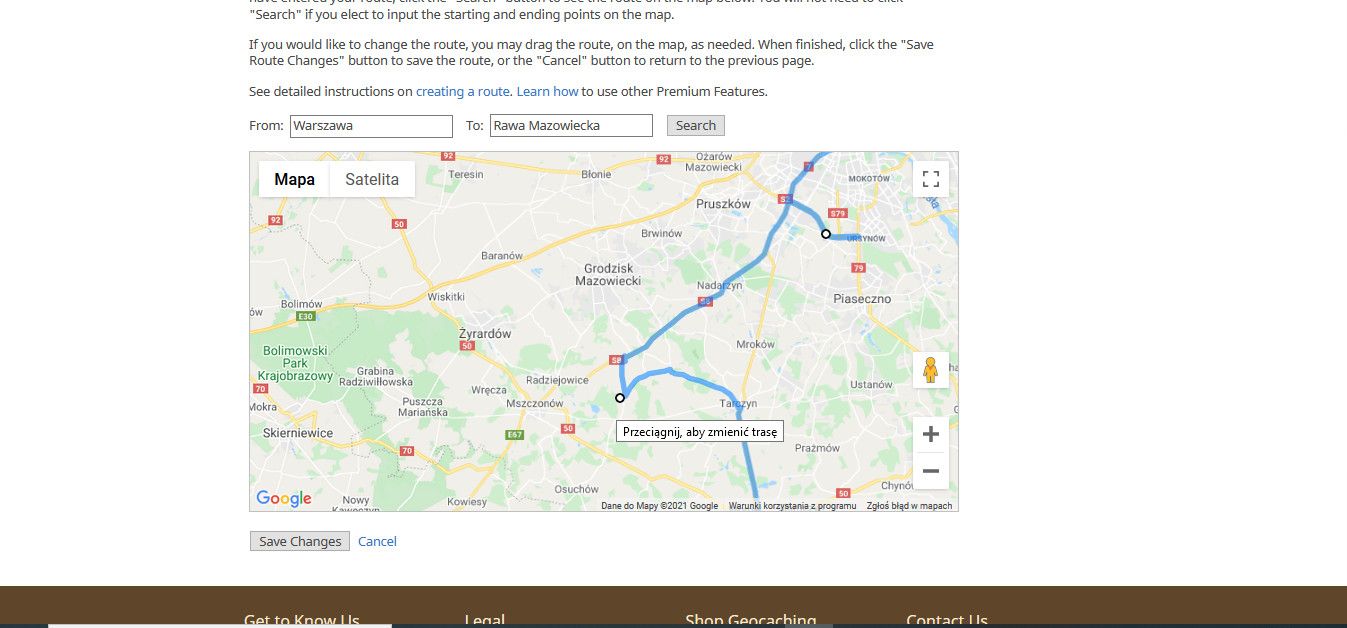
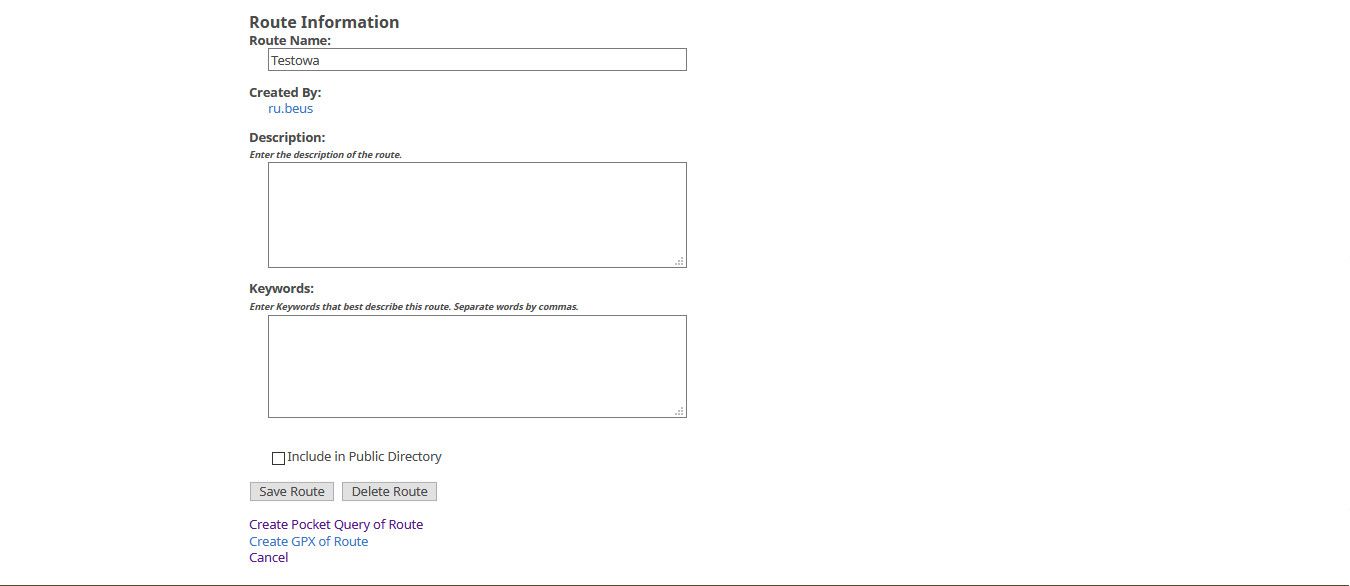
When we are satisfied with our route, we save it by clicking the 'save changes' button. On the page that appears, we can describe our route in detail, add keywords, decide whether it should be publicly visible, download it as a gpx file, and most importantly, create a Pocket Query (query to the database about caches) - that is, in fact, search for caches along our route.
Stage two – Pocket Query
Creating a Pocket Query for a route is the "actual" search for caches. Once we have generated the route and described it, click on the 'Create Pocket Query of Route' link.

We are redirected to a page where we will define the parameters to be met by our query to the database (Pocket Query), as a result of which we will receive a list of caches that meet the conditions we set.

At the very beginning, we must specify when and with what frequency Pocket Query should be launched.
We select the day of the week on which our query is to be activated and decide whether it should be run on all days of the week except the selected day, or every week on the selected day. If this is to be a one-time query, select 'Run this query once then delete it'. Using the sliders, we define the maximum distance from the route where caches should be searched, and the maximum number of caches located on both sides of the road that is to be displayed.

Below the sliders there are several tables where we specify which caches we are interested in. If we want to download all caches as we please, without any special restrictions, we simply leave the default settings in these sections. However, to adjust the search to our preferences, we need to click a bit in the tables.
In the first two, we can choose the types of caches and their size.
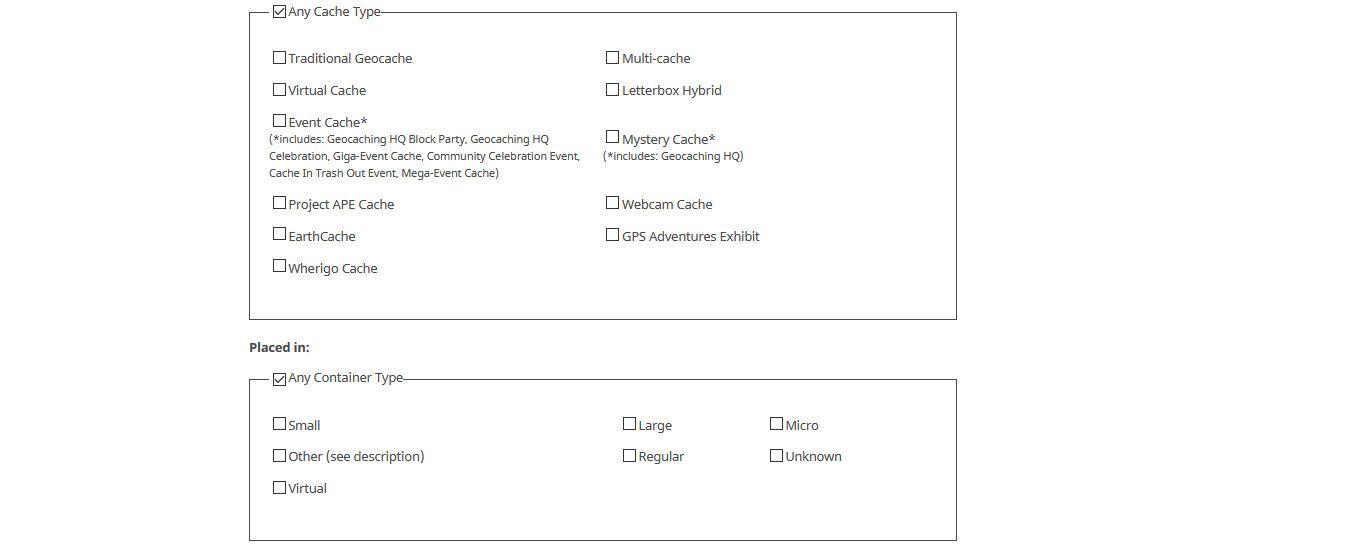
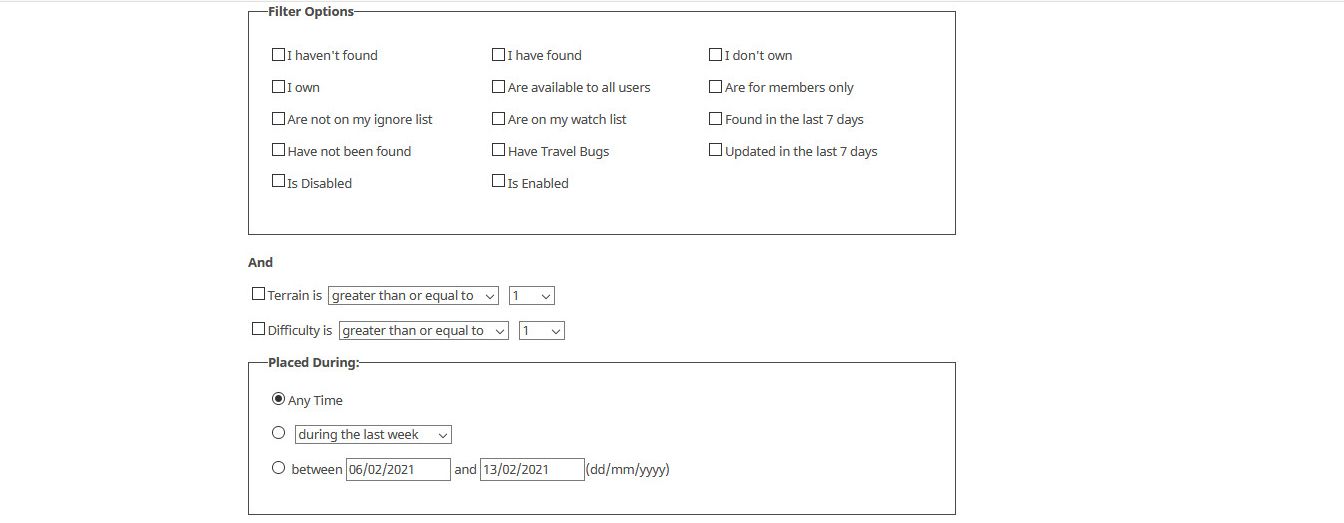
In the third section, we indicate what status the caches we are interested in should have. Do we want all of them, or are we only interested in active caches?
We can then specify the difficulty level of the task and terrain to be considered - greater than or equal to, equal to, less than or equal to. If we leave the default settings, we will receive all caches regardless of the D/T ratio Then we can specify the period in which the caches we are interested in were supposed to be created.
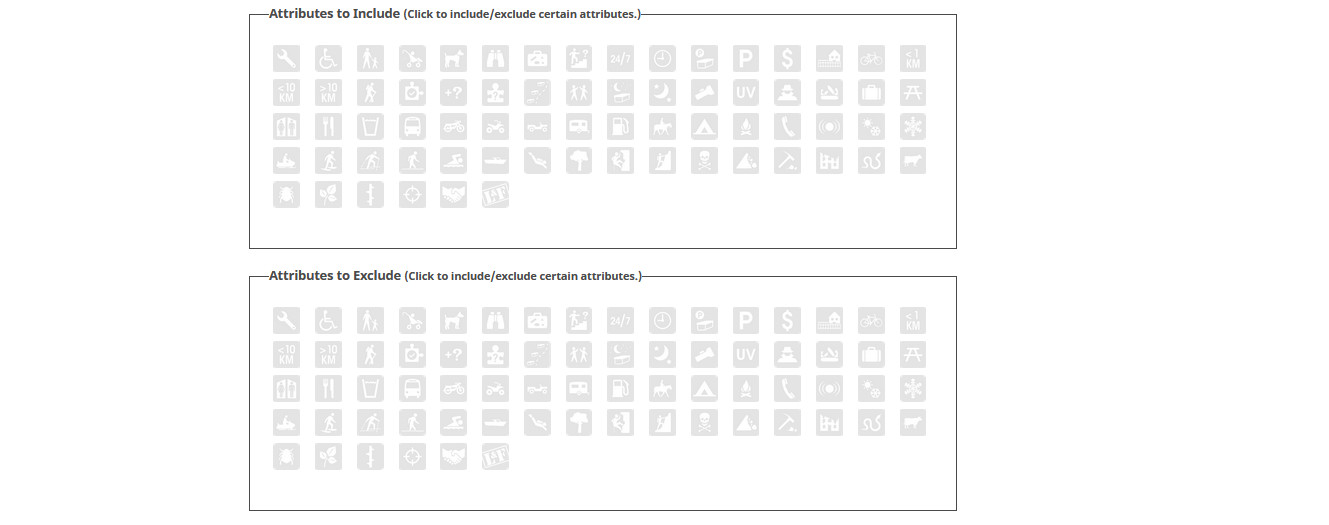
The last two tables contain attributes.
The first table describes what attributes the cache MUST have, the second table describes what attributes it CANNOT have. E.g. If we are only interested in caches that require climbing a tree, we mark the appropriate attribute in the first table, and if we do not want such caches, it should be 'activated' in the second table.
The last table contains information about the address to which information about the creation of a PQ and the possibility of downloading it should be sent, as well as the format in which they should be prepared.
The last table contains information about the address to which information about the creation of a PQ and the possibility of downloading it should be sent, and in what format the data about the caches should be prepared (we do not change this last item)

Finally, click the "Submit information" button to save our search criteria and send the query to the database.

An almost identical window with options will appear, differing from the previous one with the green inscription "Thanks! Your query has been modified. You can preview the search here.”
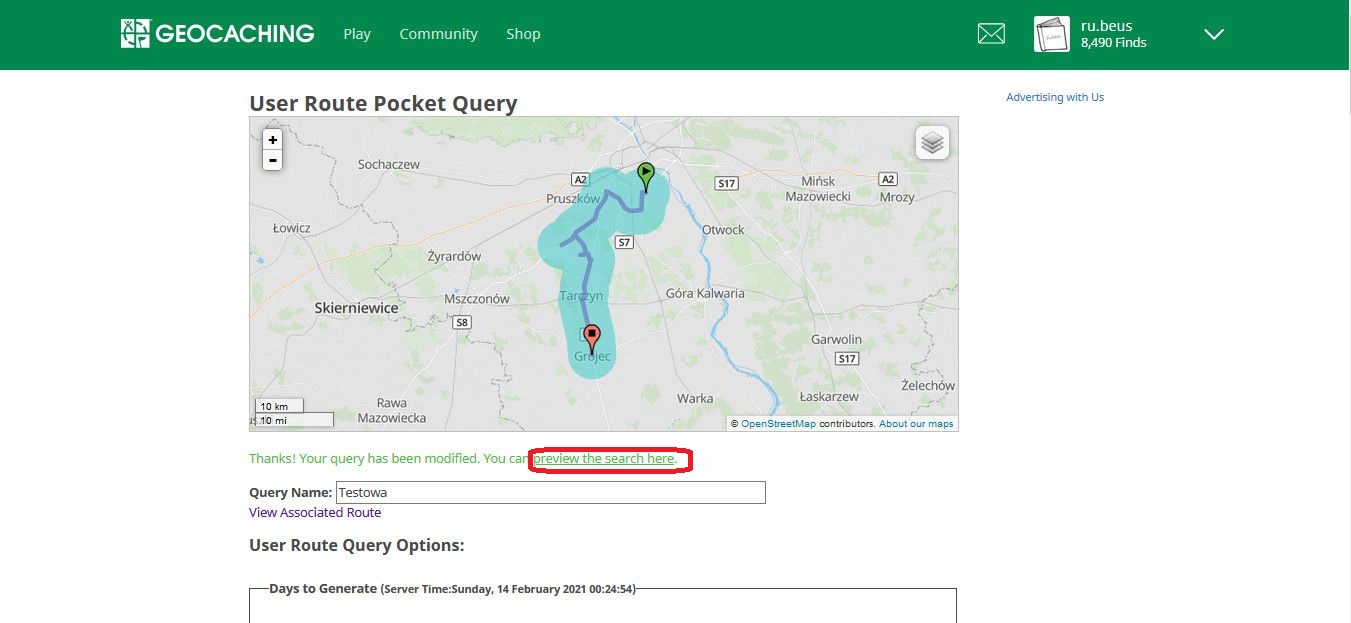
Now all we have to do is wait for the server to process the query. In the meantime, we can preview the search result by clicking "You can preview the search here" :) We will receive information about generating a gpx file with caches that meet our criteria, along with a link to download it, by e-mail. But what about a gpx file? What will I do with him? Why do I need him! I want to see the caches in my application on my phone.
Calm down, don't panic :)
It all depends on what program and operating system you use.
Android
Official application – our Pocket Query will be visible as one of the items in the Lists tab. Like any list, we can download it for offline use
c:geo – all created Pocket Queries are available in the Pocket queries tab, which will appear when we click on the three dots in the upper right corner. If a floppy disk icon is visible next to an item on the list, it means that we can download the gpx file to our device. The whole process is automatic, we just need to select the list in which our caches will be visible.iOS
Oficjalna aplikacja – our Pocket Query will be visible as one of the items in the Lists tab. Like any list, we can download it for offline use
Cachly – just like in the officia application our Pocket Query will be visible as one of the items in the Lists tab
Attention !!! The .gpx file generated from Pocket Query only contains the last five entries for each cache, and no images will be visible. You need to refresh saved caches!
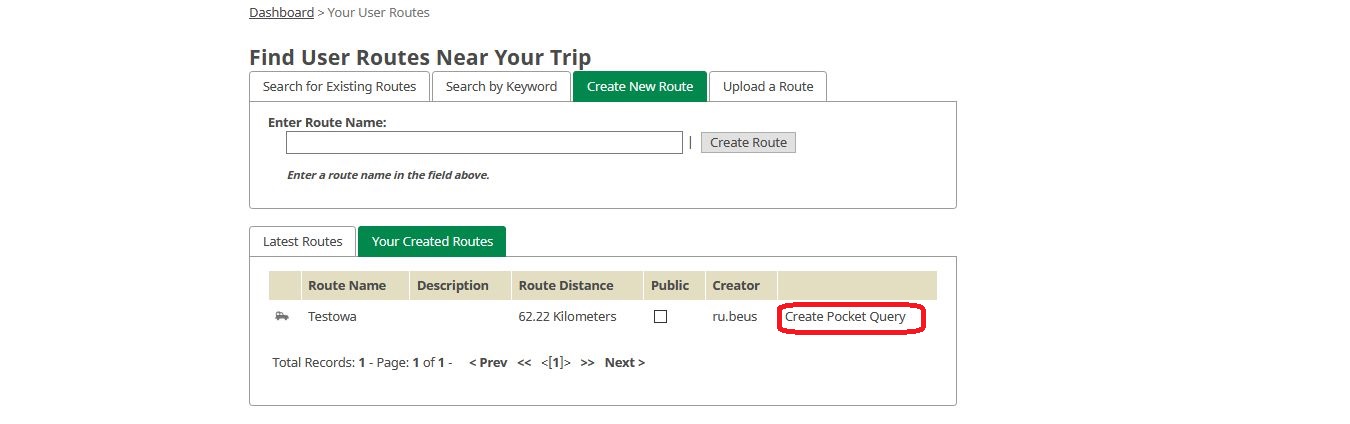
Ps. We can return to our route at any time and create a new PQ with different parameters. After we enter 'User Routes' again, it will be visible on the list in the 'Your Created Routes' tab, and the Pocket Query will be generated by clicking on the appropriate link.
Komentarze
Prześlij komentarz